Initial setup
There are a couple of things you have to do to create your own development environment to work on this website. We will describe these steps in detail here.
GitLab
To access the source code you will be working with, you have to create a GitLab account. We recommend that you create an account with GitLab directly, rather than sign up via Google or any of the other listed options, as our instructions will not cover the steps you'd have to perform for those type of accounts!
GitLab will ask you a couple of questions when you are signing up, you can fill these in as shown in the image. Afterwards, you should see the welcome screen.
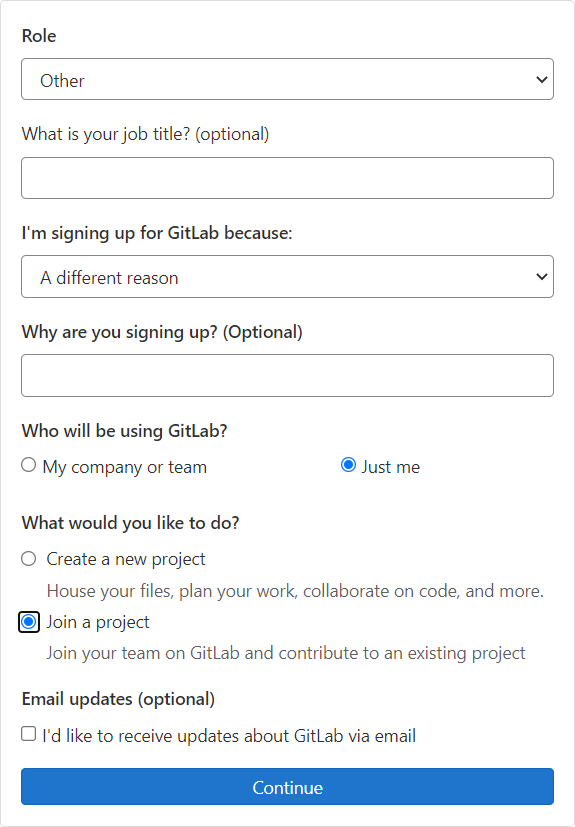
Sign up questions
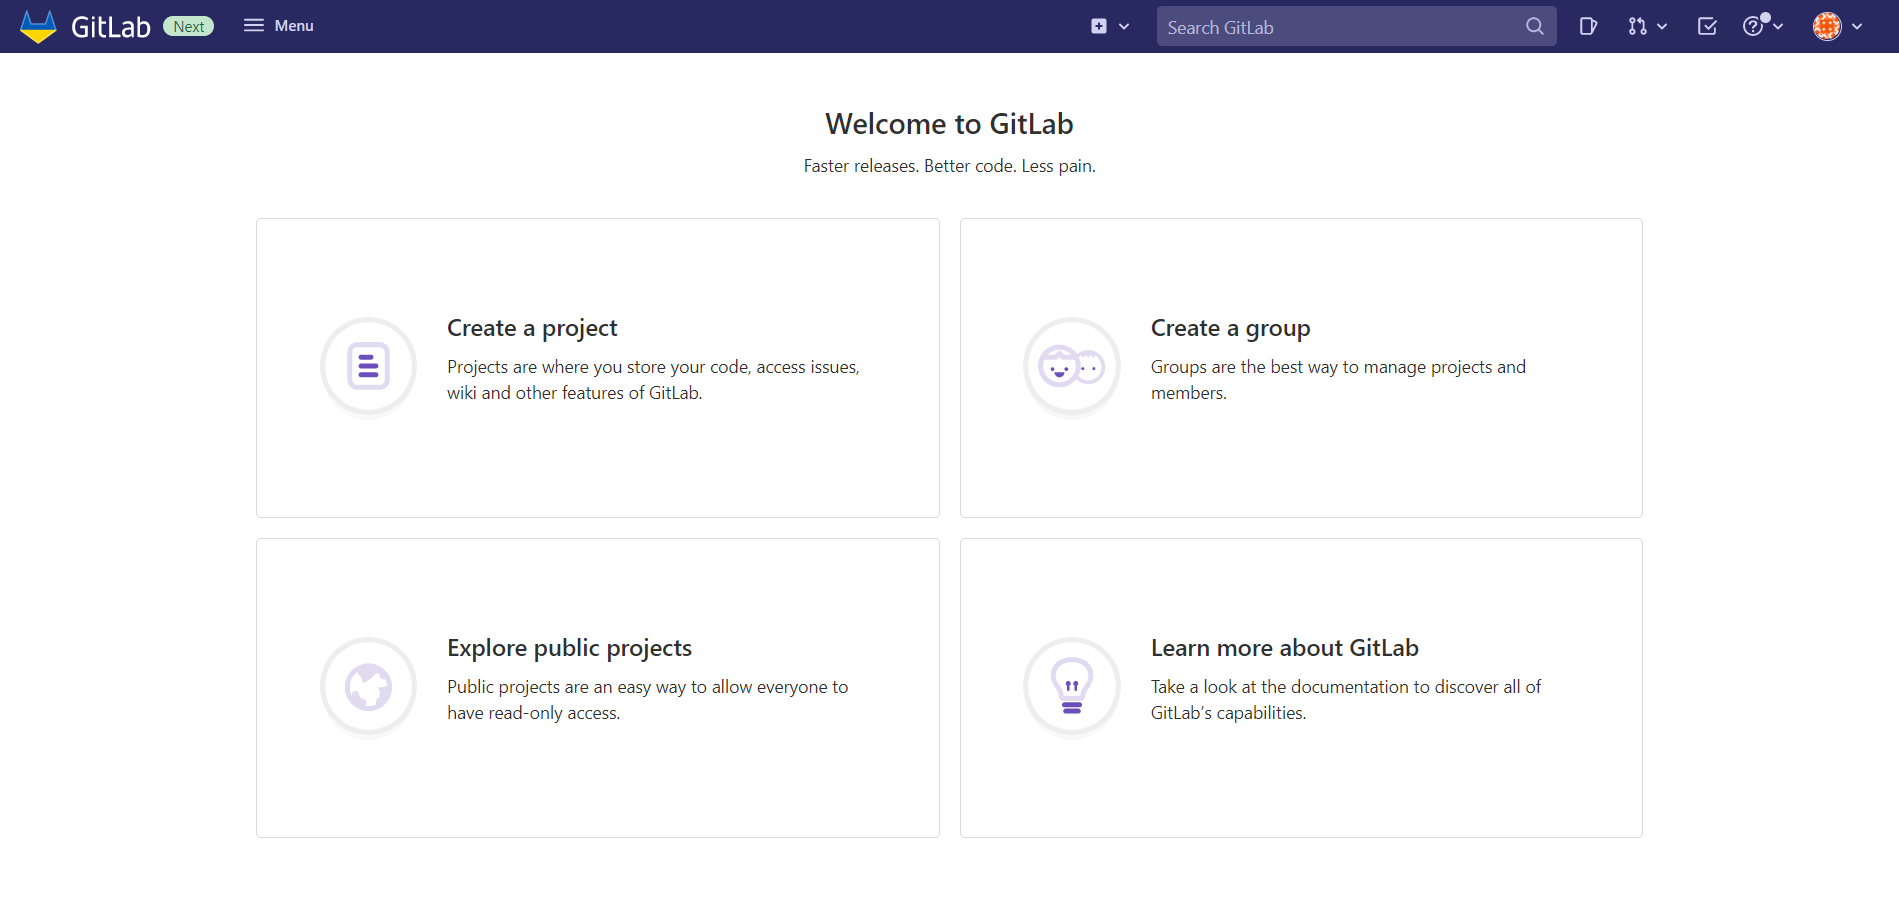
Welcome screen
Once you have created your account, go to this
repository
and click on the fork button. Important: Make
sure your fork is public and the repsitory URL is directly under your
username! Click the Fork button to create your fork.
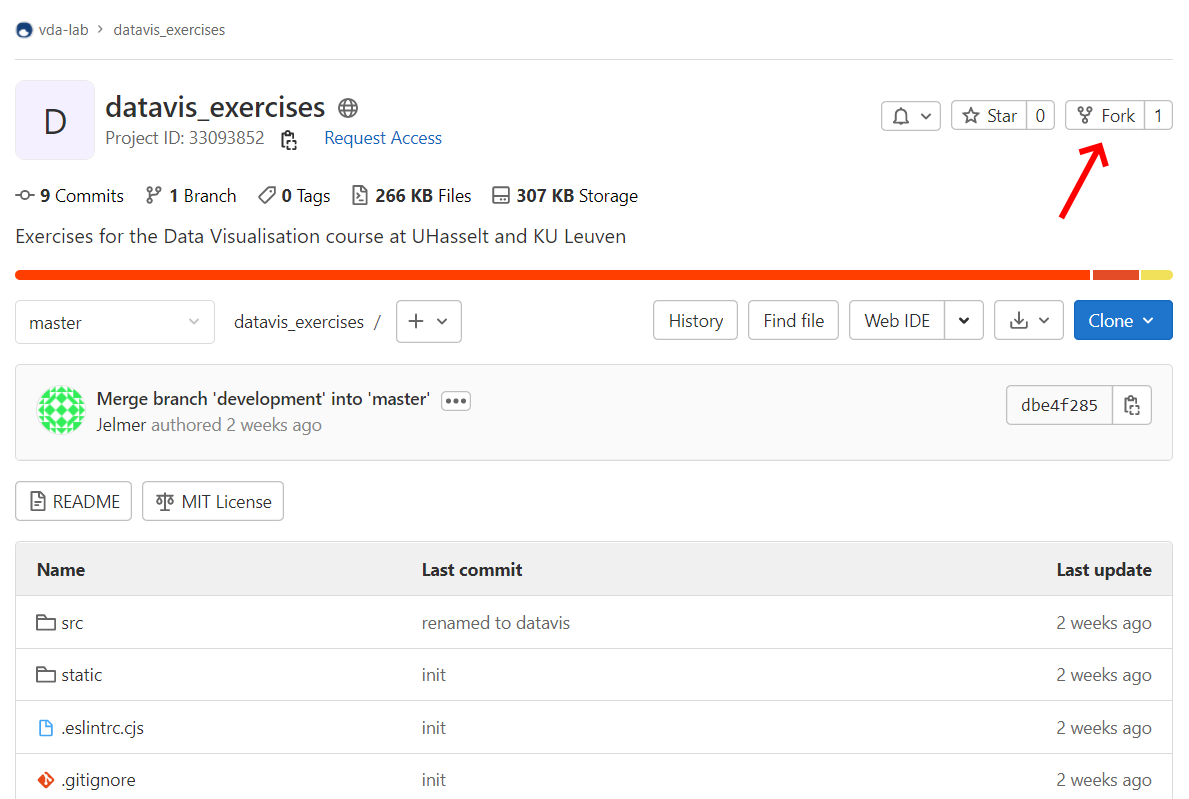
1. Click the fork button
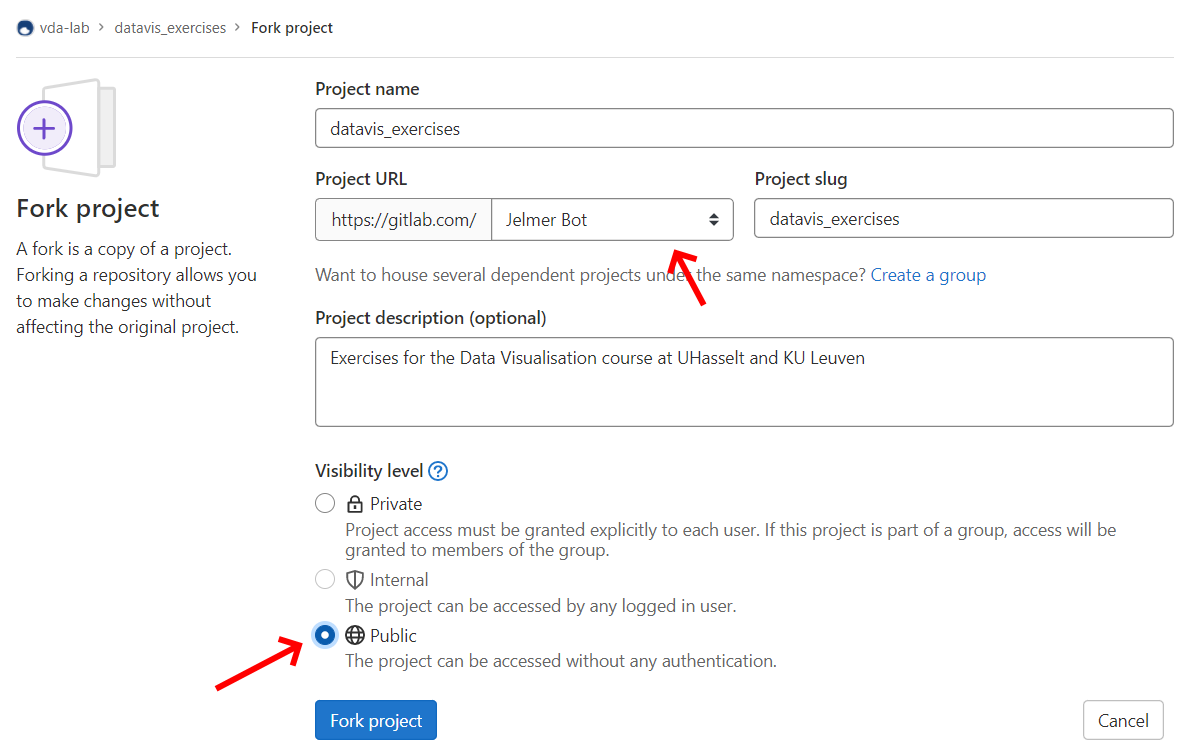
2. Set your fork to public under your account
Finally, you have to disable some of GitLab's protection on the repository's main branch. Go to the repository settings as shown in the images below and allow pushes with force.
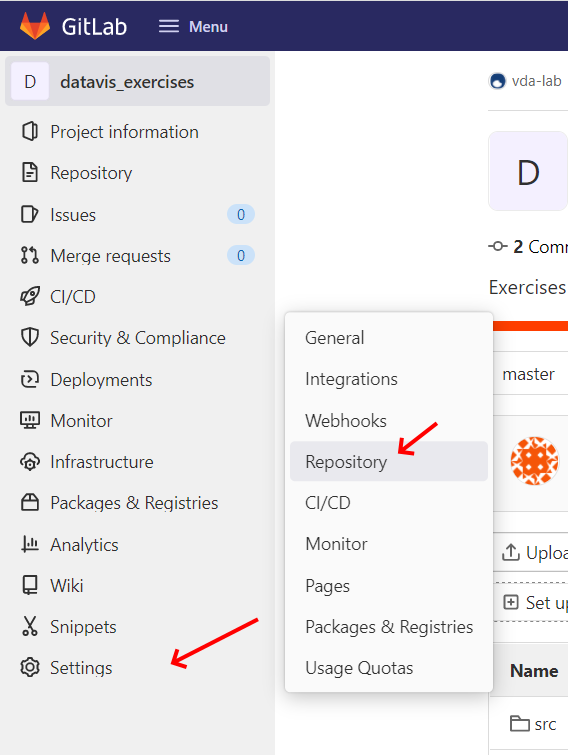
1. Open repository settings
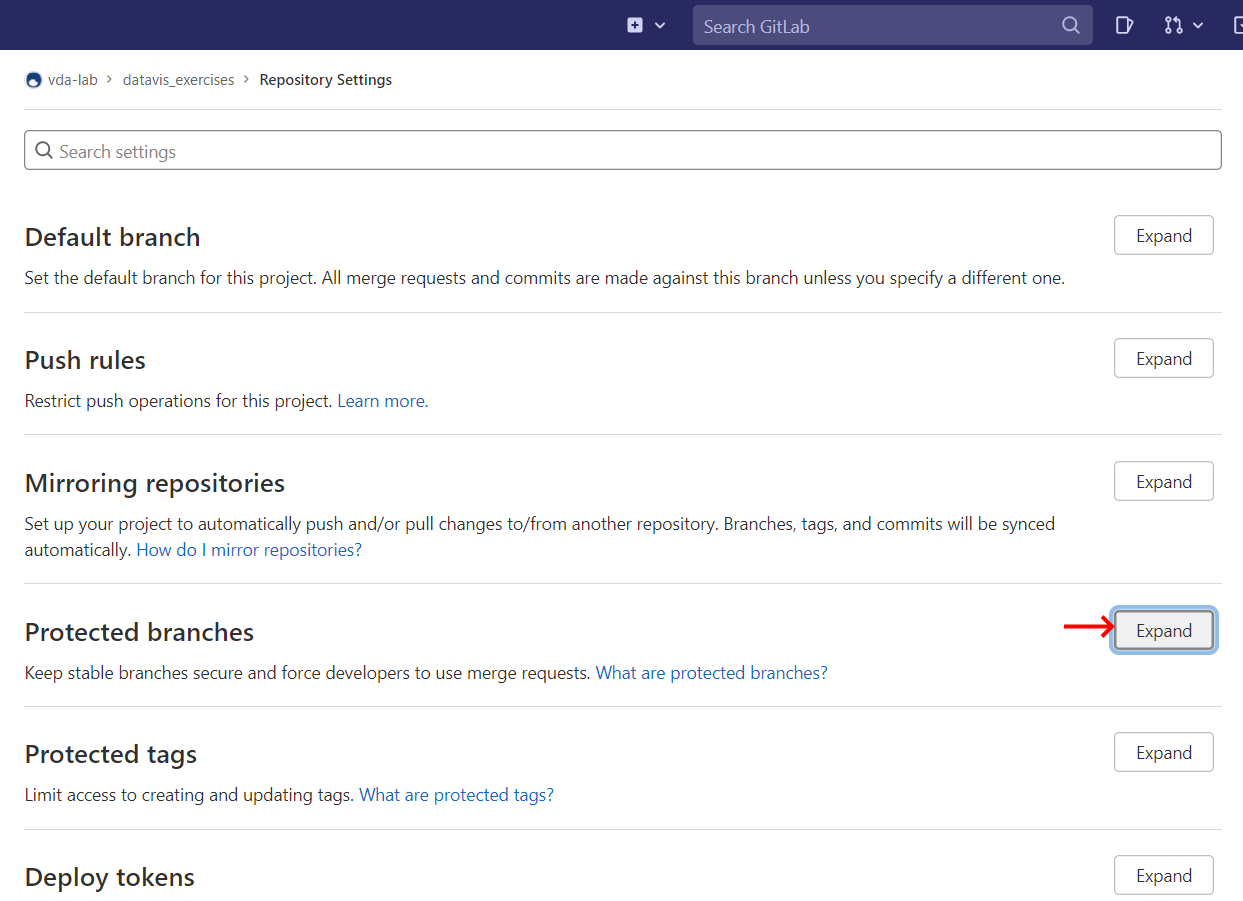
2. Expand the protected branches header
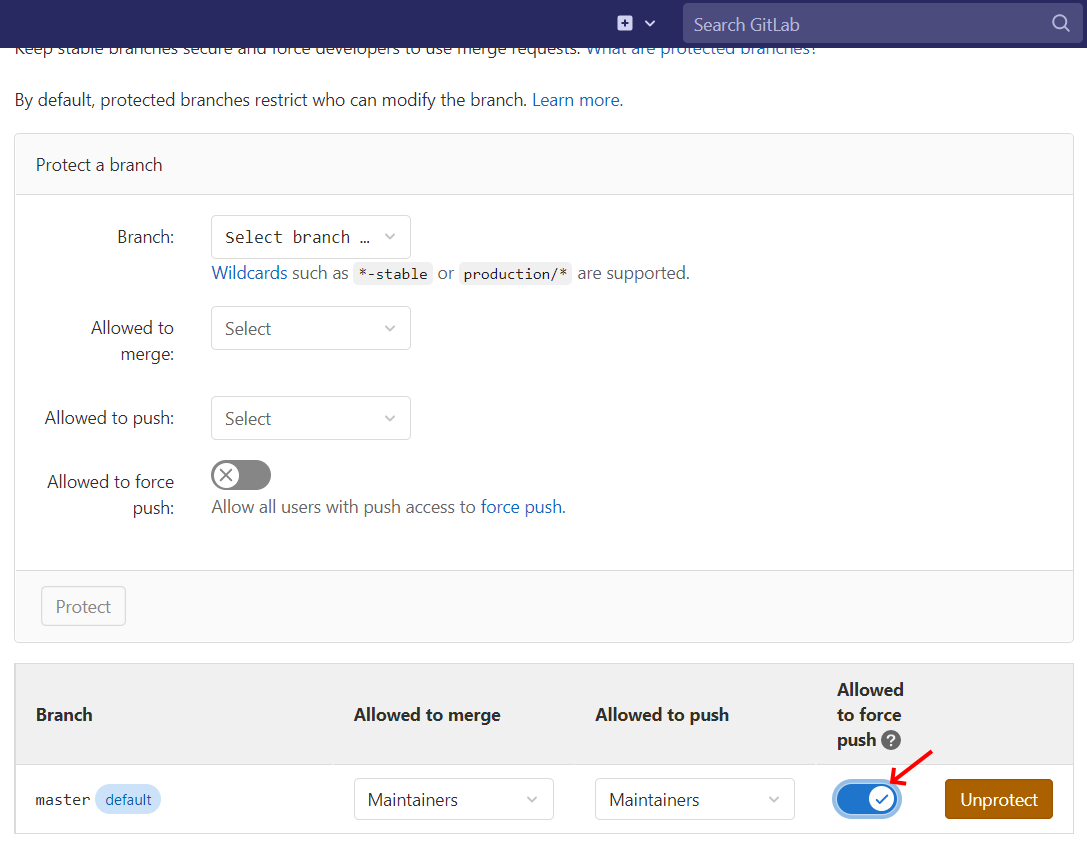
3. Enable allow push force
Vercel
We use Vercel
as hosting provider. Make a vercel account that is linked to your GitLab account
by clicking the Continue with GitLab button as shown in the image
below. This will pop up a new window, where you have to click the authorize button.
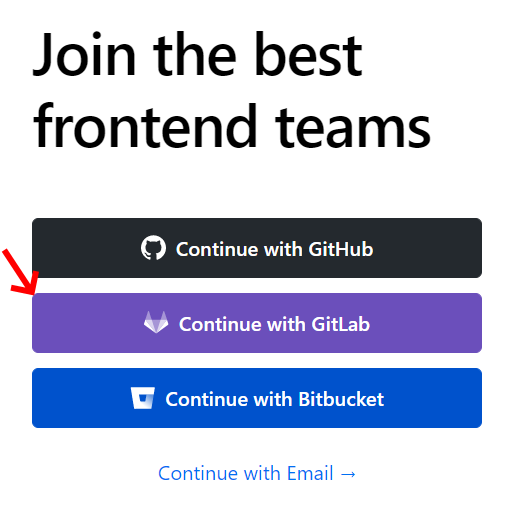
1. Vercel sign up
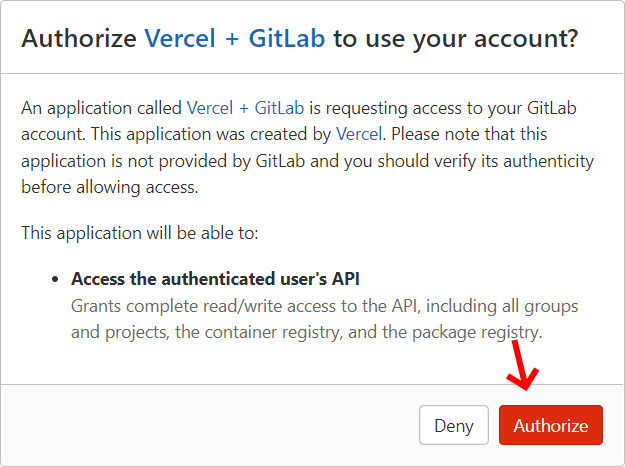
2. Authorize account
Now you are logged in, and can click the click the Import button
to import your fork of the datavis_exercises repository.
Important: prefix the project name with you student number: [studentnumber]-datavis-exercises (remove the square brackets when filling in your student number). Then, click
the Deploy button.
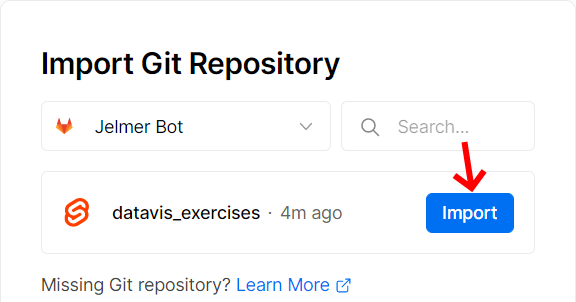
1. Import your fork
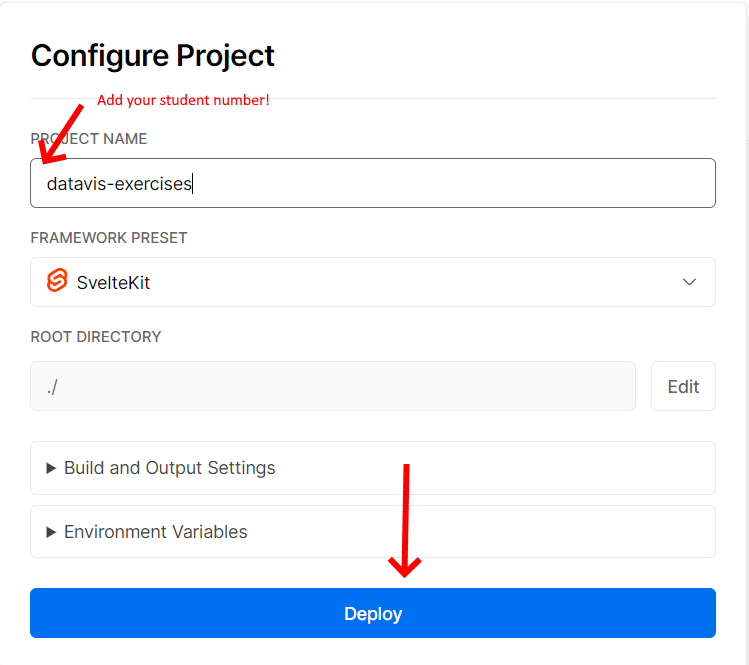
2. Change the project name
Once Vercel is done building the website, click the Go To Dashboard button. You should now be able to browse to https://[studentnumber]-datavis-exercises.vercel.app
and see your version of this website!
Installing Git, VSCode, and Nodejs
In this course, we will build custom visualizations using javascript, we
recommend you use Visual Studio Code
as a text-editor for this course. For the installation, you can just accept the
default settings. Once VSCode is installed and open, also install the
Svelte for VS Code
extension to get proper syntax highlighting and navigate to the settings page to
enable the Extensions > Git > Allow Force Push option:
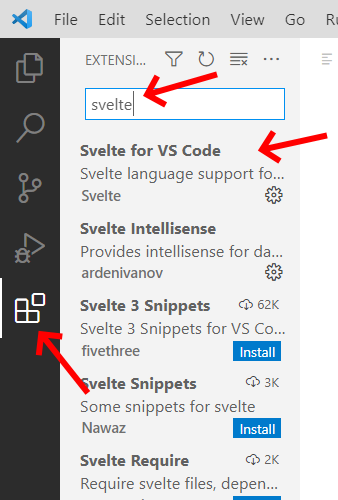
1. Install svelte extension.
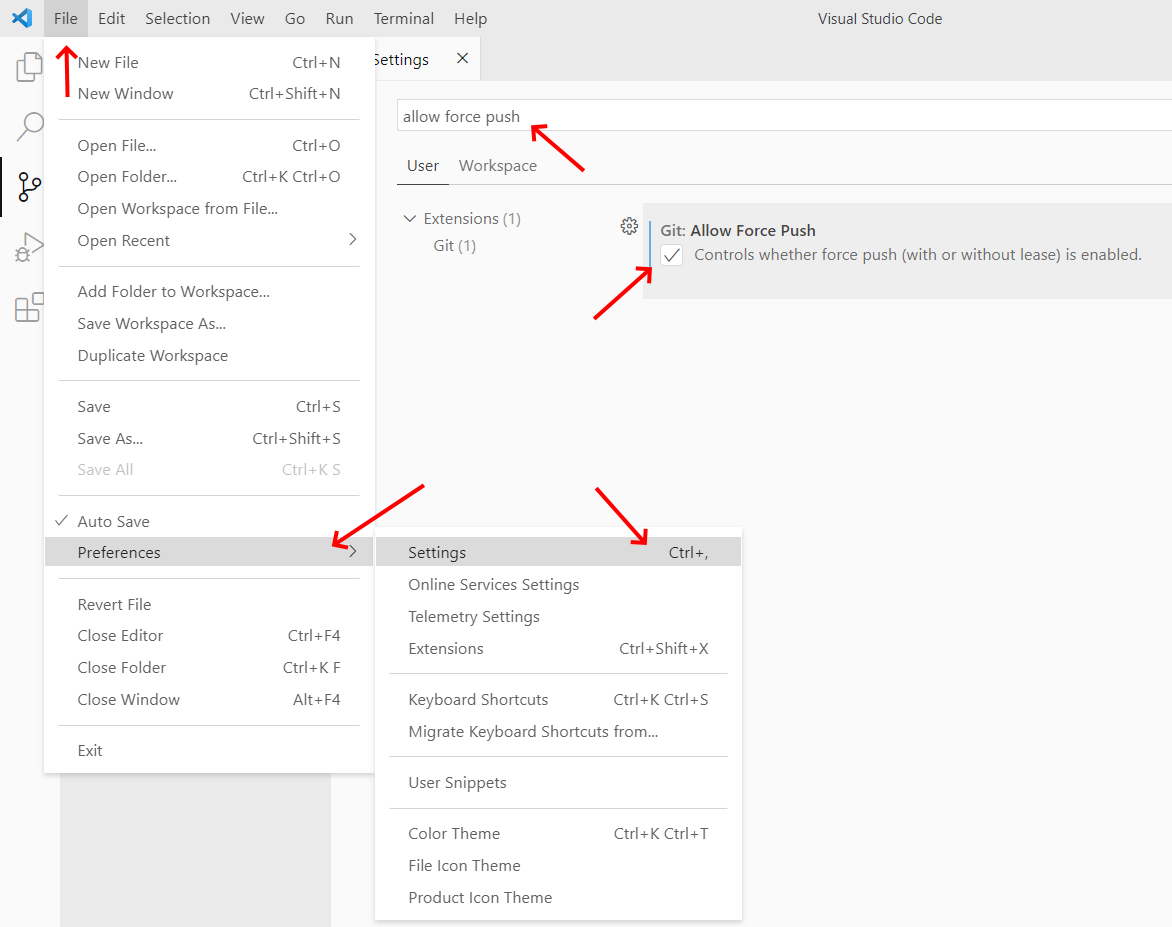
2. Enable git force-push.
To access your repository on your machine, you'll have to install git. On
linux git is probably already installed and if not, just use your package
manager to install it. On Mac, Xcode ships with git so you may already have it
installed. If not, you can install Home Brew
(see their instructions) and then install git via: : brew install git. On Windows, you have to download and install
git from this link. For the most part you can just accept the default values, but make sure to
set the default editor to VSCode and adjust your path so you can use git in
3rd-party software, as shown in the images below.
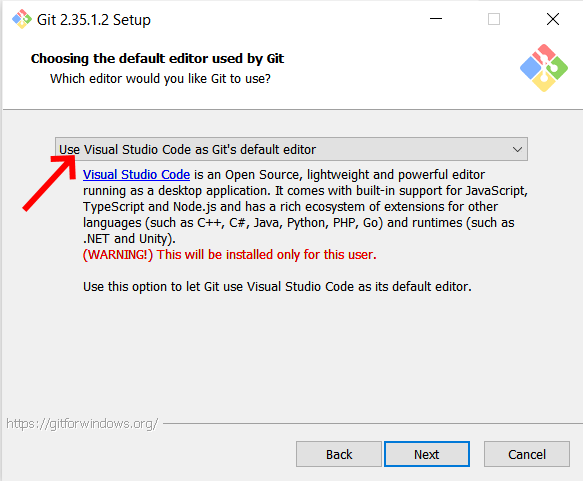
Set the default editor with git

Add git to the path
If you are on Windows, close and re-open the visual studio code editor.
Navigate to the settings page and set the Terminal > Integrated > Default Profile > Windows option to
Git Bash. Now you can access a bash terminal from within VSCode
as shown in the image below!
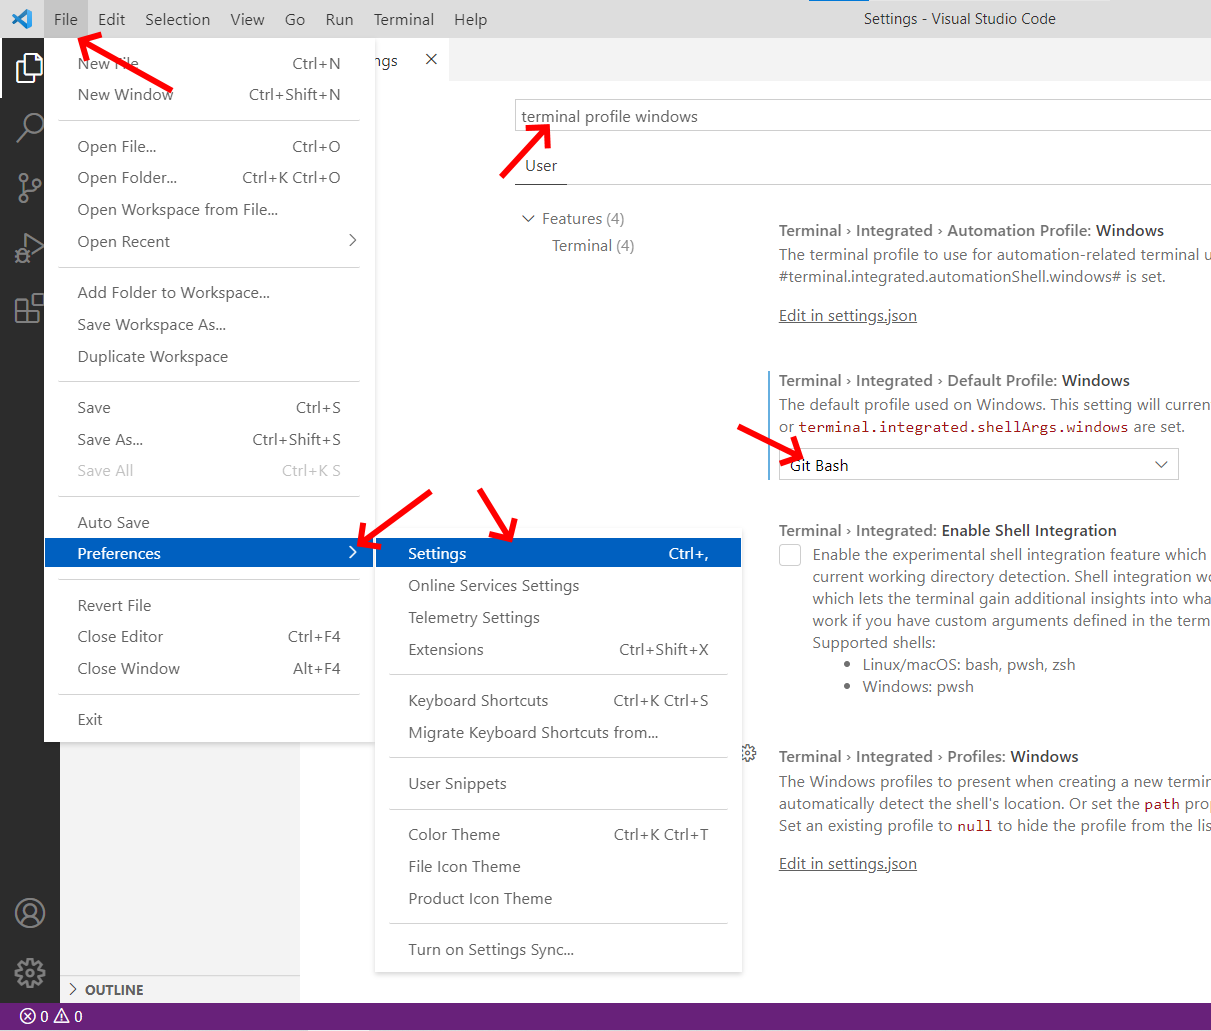
1. Set default terminal profile
2. Access VSCode's terminal
Now, we have to tell git who we are by running two commands in VSCode's terminal. In these commands, fill in your name and email in the square brackets and remove the brackets. The second image above shows how you can access VSCode's terminal.
$: git config --global user.name "[your name]"
$: git config --global user.email "[your email]"
Finally, you'll need to install nodejs to work with javascript. See their website for installation instructions. You can just use their default installation options. If you are familiar with conda, you can also use that to create an environment with nodejs.
Cloning the repository
To work on the exercises, you have to clone your fork of the website. This
will make the code available on your computer. Open VSCode, click the File / Open Folder button in the menu-bar and navigating to the folder where you want to store
this course's files (don't put the files in a local synchronization of Google Drive,
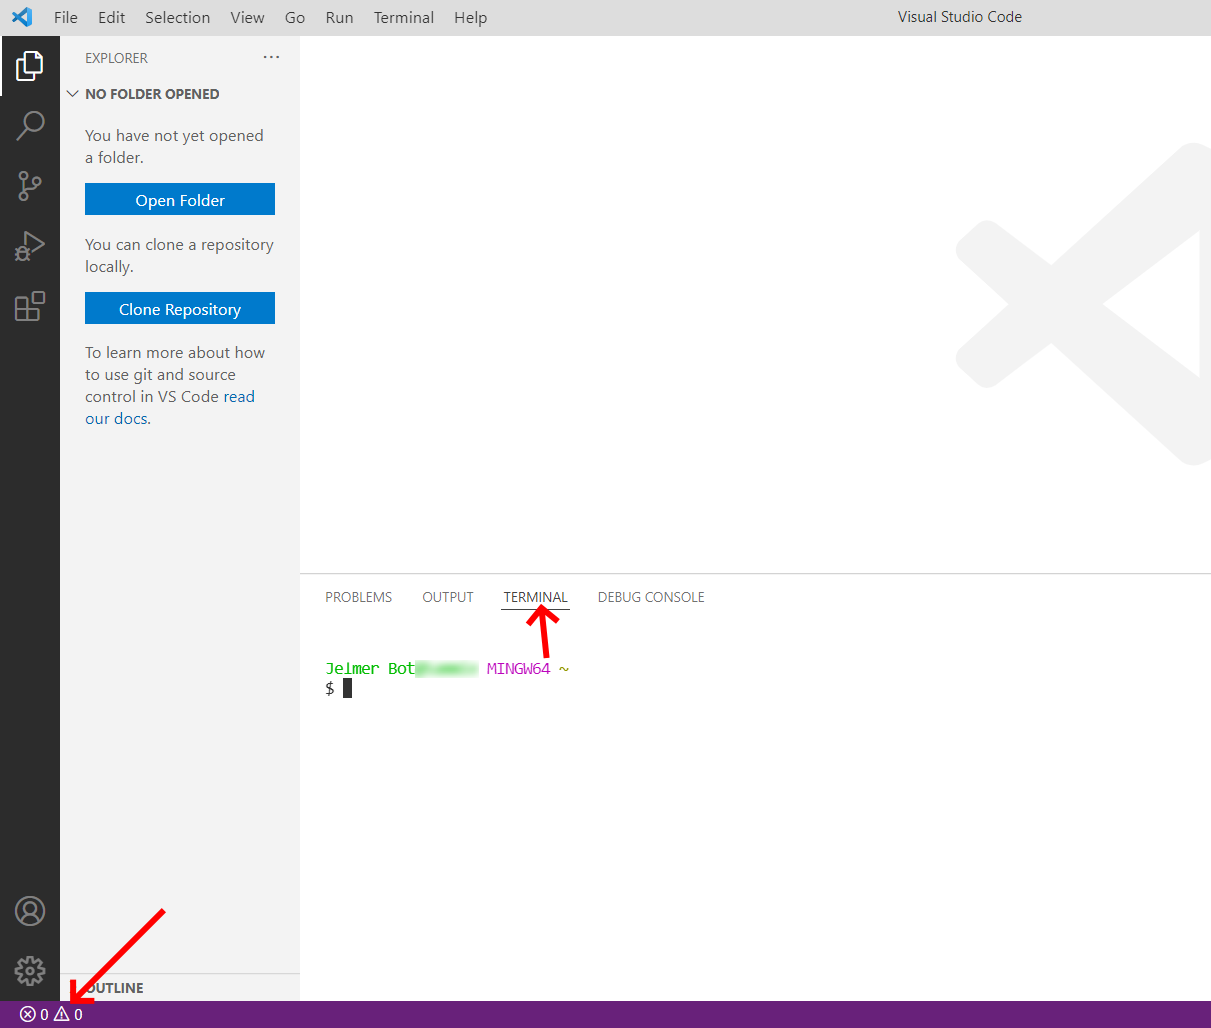
npm will break if you do). Then, open the VSCode's terminal as shown in the image
below:
Acces VSCode's terminal
To get the correct URL for cloning, you can click the Clone
button on your fork's GitLab page; use the https-URL:
$: git clone https://gitlab.com/[username]/datavis_exercises.gitNow, there should be a folder called datavis_exercises. From
this point onward, all work for this course is performed within the datavis_exercises folder. After you have opened the folder in VSCode once, you can easily find
it again under the File / Open Recent menu. The first time you open
the folder, VSCode will ask you if you trust the contents, which you can safely
accept.
Installing dependencies
The last step in getting started is installing the project's dependencies.
Open the datavis_exercises folder in VSCode, open a VSCode's terminal
and run:
$: npm installIf you get an error saying that npm cannot find a package.json file,
then you have not opened the datavis_exercises folder in VSCode directly.
Go to File / Open Folder in the VSCode's menubar and navigate to
the
datavis_exercises folder. Now : npm install should work without issue.
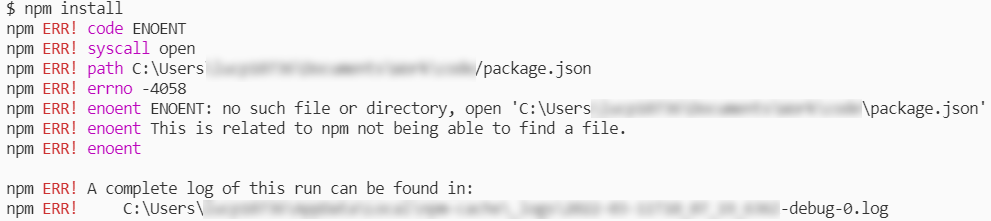
Possible npm error.
To receive the updates that we will release with each week's instructions, you
have to tell git where the original repository lives. Add a remote called upstream pointing to https://gitlab.com/vda-lab/datavis_exercises following
the steps in the images below:
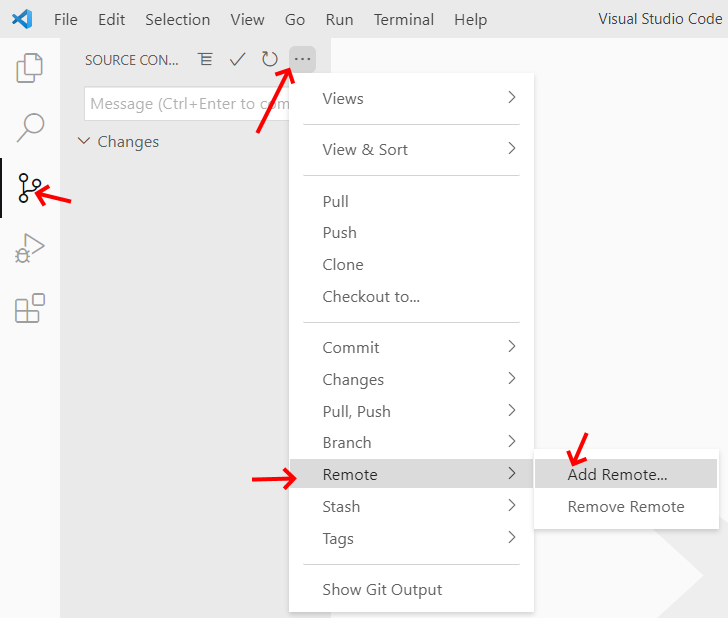
1. Add the remote
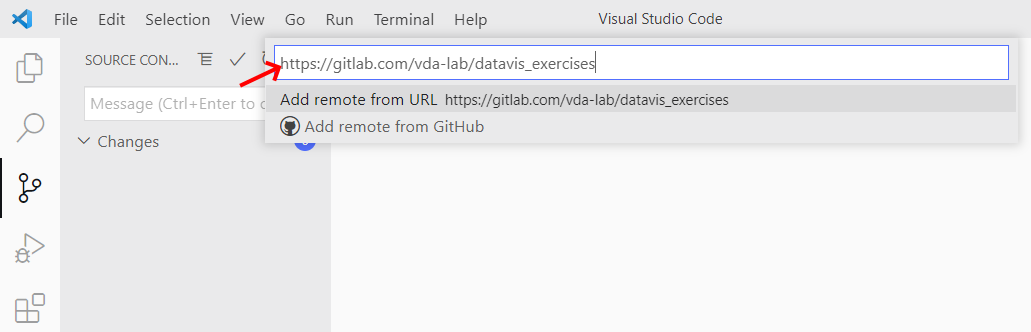
2. Fill in the URL and press enter
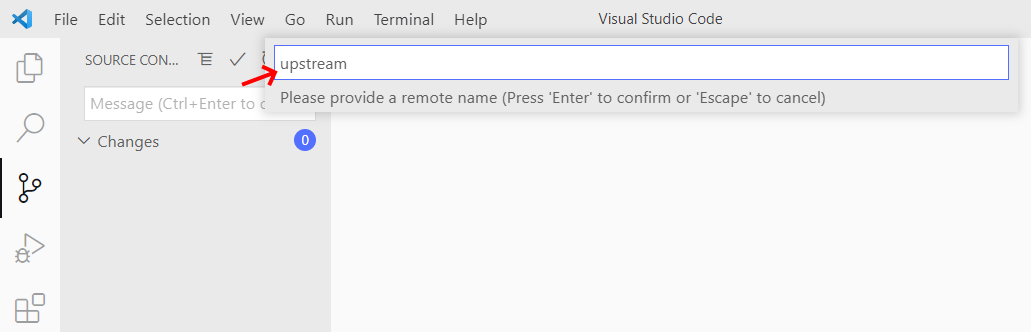
3. Give the remote a name and press enter
Now, VSCode will ask if it should automatically fetch from the remote, which you can accept:
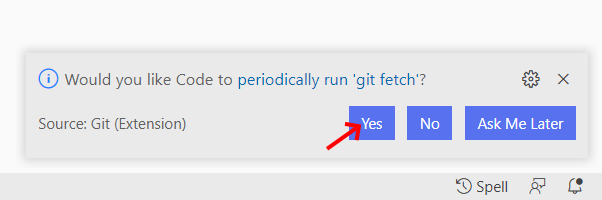
Enable periodic fetch
Important: Finaly, open the file src/routes/__layout.svelte and change lines 13 to 15 with your name, student number and the URL of your
fork:
...
  <Footer
    name="Your Name"
    number="your student number"
    url="https://gitlab.com/[your_username]/datavis_exercises"
  />
...
The end
You should now:
- Have local copy of the code for this website that will be used for the exercises.
- Your name and student number should be listed in the footer of the website.
Continue with the working on the exercises instructions!